Create a Jekyll powered blog in minutes
No other post could take this place :) It helped me setup this blog.
Quick Start
Step 1) Fork Jekyll Now to your User Repository
Fork this repo, then rename the repository to yourgithubusername.github.io.
Your Jekyll blog will often be viewable immediately at http://yourgithubusername.github.io (if it’s not, you can often force it to build by completing step 2)

Step 2) Customize and view your site
Enter your site name, description, avatar and many other options by editing the _config.yml file. You can easily turn on Google Analytics tracking, Disqus commenting and social icons here too.
Making a change to _config.yml (or any file in your repository) will force GitHub Pages to rebuild your site with jekyll. Your rebuilt site will be viewable a few seconds later at http://yourgithubusername.github.io - if not, give it ten minutes as GitHub suggests and it’ll appear soon
There are 3 different ways that you can make changes to your blog’s files:
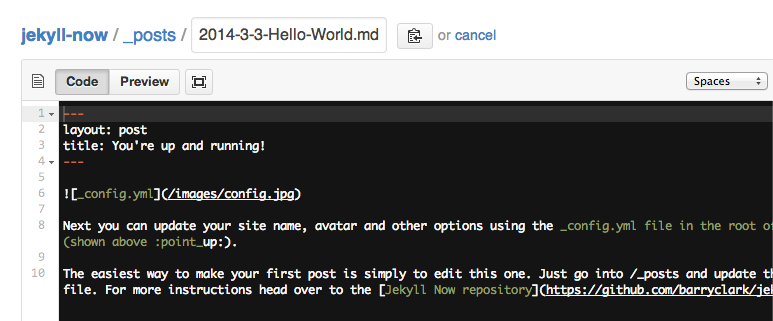
- Edit files within your new username.github.io repository in the browser at GitHub.com (shown below).
- Use a third party GitHub content editor, like Prose by Development Seed. It’s optimized for use with Jekyll making markdown editing, writing drafts, and uploading images really easy.
- Clone down your repository and make updates locally, then push them to your GitHub repository.

Step 3) Publish your first blog post
Edit /_posts/2014-3-3-Hello-World.md to publish your first blog post. This Markdown Cheatsheet might come in handy.

You can add additional posts in the browser on GitHub.com too! Just hit the + icon in
/_posts/to create new content. Just make sure to include the front-matter block at the top of each new blog post and make sure the post’s filename is in this format: year-month-day-title.md